![[ Swingley Development ]](../images/title.png)
![[ Jump to Content ]](../images/blank_white.png)
Krenov-style Shelves (page 3 of 3)
This page shows the final steps in finishing my Krenov-style shelves. The most recent of these images were taken on the 12th of November, 2000. Thanks to my wife Andrea for taking such good photos of me at work.
Other Woodworking pages:
| Projects | Plans | Tools | OldTools Archive |
 Virtually all the woodworking is now finished (I still need to cut
the slots in the tenons for the wedges and make a drawer for the
right side of the lower shelf), so I'm now finishing the case.
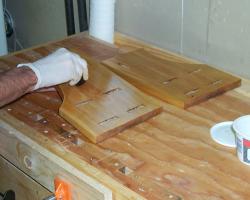
The first step is to lather on boiled linseed oil. After the oil
soaks in for a minute or two, I wipe off the excess and let the oil
dry overnight.
Virtually all the woodworking is now finished (I still need to cut
the slots in the tenons for the wedges and make a drawer for the
right side of the lower shelf), so I'm now finishing the case.
The first step is to lather on boiled linseed oil. After the oil
soaks in for a minute or two, I wipe off the excess and let the oil
dry overnight.
After the oil has dried, I pad on a 2# cut of Paddy's super blonde shellac. I use a piece of an old t-shirt wrapped around a wad of cheesecloth as my pad, and pad on about five layers on each side.
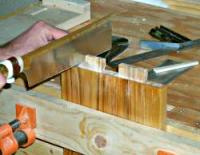 After the shellac has dried, I'm ready to begin assembling the shelves.
First I cut two slots in each tenon for wedges. The slots extend about
2/3 of the way down the tenon. If you cut them all the way, the wood
could split into the shelves and it would be visible.
After the shellac has dried, I'm ready to begin assembling the shelves.
First I cut two slots in each tenon for wedges. The slots extend about
2/3 of the way down the tenon. If you cut them all the way, the wood
could split into the shelves and it would be visible.
Before gluing the whole thing together, I made sure I knew which order things had to be assembled, and had all my cauls and clamps ready. Once the glue is out of the bottle, you've got a very limited amount of time to get everything in place. I like to use a cheap acid brush to spread a nice even coat of glue on the tenons (above).
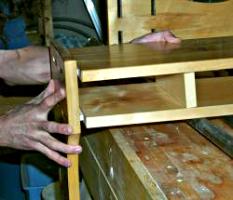 The first step in getting everything together is putting a little
glue on the tenons of the cross piece that goes between the shelves,
and loosely fitting it. Then put glue on the right side tenons,
and carefully slip the shelves and back support into the right
side. Finally put glue on the left side tenons and fit the left side.
I couldn't get everything completely together by hand, so I used my
clamps and cauls to carefully squeeze everything together.
The first step in getting everything together is putting a little
glue on the tenons of the cross piece that goes between the shelves,
and loosely fitting it. Then put glue on the right side tenons,
and carefully slip the shelves and back support into the right
side. Finally put glue on the left side tenons and fit the left side.
I couldn't get everything completely together by hand, so I used my
clamps and cauls to carefully squeeze everything together.
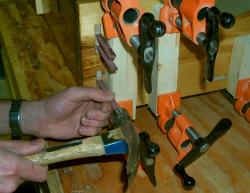 The last step before letting everything dry is to hammer in the
wedges into the tenon slots. I used very thinly cut purpleheart
strips (cut at about a degree) for my wedges. Because the sides
of my shelves had already cracked once, I used thin wedges, and I'm
not depending on them to do anything but fully seat the tenon sides
in the mortise.
The last step before letting everything dry is to hammer in the
wedges into the tenon slots. I used very thinly cut purpleheart
strips (cut at about a degree) for my wedges. Because the sides
of my shelves had already cracked once, I used thin wedges, and I'm
not depending on them to do anything but fully seat the tenon sides
in the mortise.
 Once the glue dried I applied several more coats
of shellac to all the exterior surfaces. After a week I sanded the
exterior surfaces with 600 grit sandpaper wetted with soapy water, and
smoothed the light scratch marks with #0000 steel wool. Finally, a
light coat of paste wax, and the shelves are finished!
Once the glue dried I applied several more coats
of shellac to all the exterior surfaces. After a week I sanded the
exterior surfaces with 600 grit sandpaper wetted with soapy water, and
smoothed the light scratch marks with #0000 steel wool. Finally, a
light coat of paste wax, and the shelves are finished!
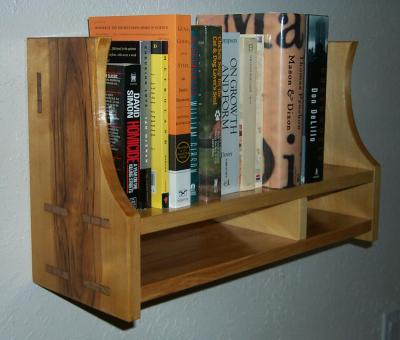
Here's the shelves hanging on the wall. I haven't built the little drawer that will fit into the right space beneath the bookshelves, but I need to refine my dovetailing skills first!